Tuesday, September 30, 2008

Currying favor

So I opened the cabinet to see what I could do about dinner and realized that, while we had come in under budget this week when grocery shopping, we had missed a few things. Important things like meat.

That's not strictly true, of course - the butcher's department is my favorite part about grocery shopping and a trip to the market isn't quite fulfilling without some quality time spent poking through the ground beef trying to find the elusive packages of 90% lean (perfect for burgers - 85% is too fatty and 93% doesn't have enough fat to taste like anything much) but the chicken breast we picked up I had already boiled for sandwich meat for the week (more on that in a couple of days), the shrimp vanished Saturday during a cocktail sauce experiment and the stew meat had ended up in a fantastic chili on Sunday night.

Change of plans, then - I went about seeing what I could do to clear out the fridge.

- - -

I have one memory of preschool, and that's of celery sticks with peanut butter or cream cheese in the middle. I could have sworn it was a family thing but when I mentioned it in passing to my father he steadfastly claimed to have never heard of such a thing. Despite the pleasantness of the memory, I'm not a big fan of celery unless it's served next to a heaping pile of buffalo wings or boiled to hell and back in a soup. Something about the texture rubs me the wrong way.

Why do I mention this? Guess what caught my eye when I opened the fridge - celery with an inch of life left in it, and a jar of peanut butter on its last legs. Ah well.

But then I got to thinking: Celery goes with peanut butter. Peanuts are used heavily in Thai food. Thai food leans heavily on curry. Curry is all spices and time, I've got plenty of both and I hate, absolutely hate, wasting food.

So here you go -
- a simple peanut and celery curry. It's hot enough to make your skirt fly up and it goes really, really well with a nice, slightly bitter beer (which, conveniently, I've also got in the fridge.)

I love it when a plan comes together.

Ingredients:

  • 3 celery ribs, roughly chopped
  • 1 small yellow onion, roughly chopped
  • 2-3 heaping tbsp peanut butter
  • 2 tsp salted butter
  • 1 tsp olive oil
  • 1 tsp minced garlic
  • 2 cups broth; I used chicken, though vegetable would work fine, too
  • 1 tbsp curry powder
  • 2 tsp brown sugar
  • 1 tsp cumin
  • 1 tsp chili powder
  • 1 tsp dry yellow mustard
  • 1 tsp paprika
  • 1 tsp white pepper
  • 1 tsp black pepper
  • 1 tsp dried parsley
  • 1/2 tsp tarragon
  • 1/2 tsp cinnamon
  • Salt to taste
optional:
  • 1/2 cup toasted pine nuts (I had them left over from a pesto gone wrong, so I figured what the hell)
The Gist:

Lightly brown the celery, onion, and garlic in the butter and olive oil in the bottom of a stock pot with a pinch or two of salt. Add the broth, the peanut butter, the pine nuts if you went that route, and the spices. Heat slowly over medium heat, stirring frequently, until it starts to bubble. Keep stirring for a minute or two - the peanut butter is going to take some elbow grease to mix in completely.

Once it's all combined, cover and reduce heat to low. Not medium-low; practically nonexistent low - the peanut butter is going to slowly sink to the bottom of the pot and if it's too hot it'll burn.

The longer you simmer it the better it will taste, but keep an eye on it and stir it every 15 minutes or so. It'll be done in 45 minutes, tasty in 60 and fantastic in 90.

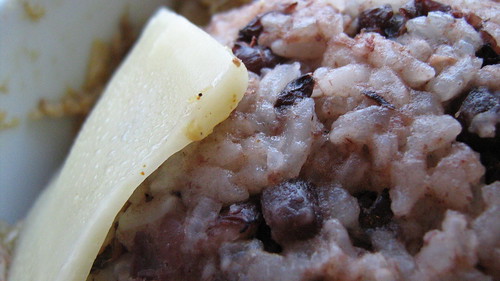
Serve over rice. Feeds 3-4 people depending on their love of curry.

Monday, September 29, 2008

Fry me to the moon

We thew a little get together this weekend, nothing fancy - chili and beer and, once things got rolling, some deep frying action. The chili was pretty damn good but it's going to take some time for me to figure out what the hell I did, so in the interim: French fries.

Deep frying has a bad rap, deservedly so from a heath perspective, but come on. Nothing is tastier on a late spring afternoon than a burger with homemade fries.

This is my father's recipe, which is probably as simple as you can get. The equipment, however, is less standard but pretty damned important. so here goes.
You'll need a large pot with high vertical sides to keep the oil in. You'll also need a thermometer, a metal slotted spatula or metal tongs, paper towels and a small pile of newspaper or, failing that, more paper towels.

Some notes on this stuff: Cast iron is best because you're going to be heating the oil to a very high temperature and cast iron stands up to that best, though the size is more important than the material. You'll need a multipurpose kitchen thermometer - a meat thermometer won't do you any good because most of them only go up to 200-something degrees Fahrenheit and that's not gonna cut it. And you'll need a metal slotted spatula because the slots will let the excess oil out and the metal won't melt in the oil. You'll also need some frying oil (corn, vegetable or peanut, not olive. Olive oil will burn before you get it to a high enough temperature) and, I guess, some potatoes.

Skin your potatoes if you want (I don't), slice 'em how you want 'em and leave them in a bowl of ice water for 45 minutes or so - this will wick away some of the potatoes' starch and make 'em crispier when they actually go in the oil. Pour about three inches of oil into your pan, and heat it to 325F over medium-high heat. Don't crank it all the way, as you want to make sure it heats relatively evenly. You don't have to stir it, but keep an eye on it. Its temperature will rise exponentially, so start getting ready when it hits 300 degrees fahrenheit or so.

heating oil always scares me, and it damn well should scare you. It's probably obvious, but for the record (again): be careful. hot oil can cause serious damage to you, to your pets, to your children and to anything else it comes in contact with. Don't ignore it and stay clear and please, for the love of all things holy, keep your utensils clean and dry - clean so that whatever might be stuck to them doesn't contaminate the oil and dry so the oil doesn't spit when you're fishing around for the potatoes.

There are some tricks to knowing when the oil's ready if you don't have a real thermometer, but most of those, like flicking some water (or, if you're my father, spit) into the oil to see if it bubbles on contact, are imprecise or gross. Those tricks are good at telling if the oil's hot enough, but bad at telling if it's too hot - overheated oil will burn the outsides of your fries before the insides are done, and it's best to avoid that. It will also smoke, which is an eye irritant even if you can't actually see it in the air.

Once your potatoes have soaked and your oil's at the right temperature, pat them dry with a paper towel and gently slide them into the oil. They'll spit like mad, so stand back. You're going to have to do this in batches to make more than a single serving of fries, but you're not cooking them for that long and you'll get into a groove fairly quickly. Fry the potatoes for 4-5 minutes, turning frequently. When they've reached a golden-brown (which can be hard to judge right, but you'll get the hang of it) pull them out.

You're not done yet: the trick to good fries is to fry 'em twice. Crank up the oil's temperature to 375F. Once it's there, drop your fries back in for 2-3 minutes. The second frying will crisp the outsides of the fries to keep 'em from getting mushy. Pull them out and drop them into a thick rolled up cone of newspaper or into a wooden or metal (not plastic) bowl lined with paper towels. The newspaper will absorb the surface oil without pulling the oil out of the centers of the fries, leaving them moist.

Salt prodigiously and serve immediately. A potato and a half will comfortably serve one person as a side, double it otherwise. Multiply as required. And if you have a massive coronary, it ain't my fault.

(If this looks familiar, a different version of this was originally posted here.)

Friday, September 26, 2008

Chicken Week, Days 3-5: I blew it.

I tried to make the chicken last a week, I really tried, but two things came around and bit me in the ass: chicken bones and a bored palate.

The bones were totally my fault - it turns out, if you boil a chicken down to a shreddable consistency, you're going to end up with teeny, tiny little bones in every bite that, because they've been floating around in hot water for hours and hours, don't crunch so much as get gooey and melt. It isn't appetizing; after day 3 (I made fried rice, sorta, pictured above, which looked much, MUCH better than it tasted), and prodded by Angela with the suggestion of dinner and a movie (a suggestion I latched onto with an inappropriate degree of force) I decided to let the experiment die.

The bored palette, well. I should've known it was going to be an issue. Angela was fine with it, but I got fed up halfway through dinner on Wednesday and made myself a sandwich. Game over, man.

I did learn a couple of things, though:

  1. A whole chicken is fine to eat but a mess to boil. Next time, I'm getting a breast instead - its edibile bits-to-structuring ratio is much more acceptable, the cost isn't too much different if the breast is on sale and you make a portion of that back by not having to deal with the bones and whatnot.
  2. Likewise, boiled chicken breast makes for amazing sandwiches, and a bunch of them - that chicken breast made 6 lunches which is better than I usually get with a pound of meat from the deli - its texture helps fill out a roll better, or something.
  3. Shredded dark meat, if you're not going to eat it right away, gets a paste-like consistency in the fridge if you let it sit for a day or two. It's still perfectly safe to eat but the individual strands of meat start congealing. I'm big on pleasant textures and that wasn't one.
So that's it for that experiment. The next time we decide to play it cheap, I'll do some planning. Maybe.

Wednesday, September 24, 2008

Chicken Week, Day 2: Soup

After last night I had more rice, beans and shredded chicken than I knew how to handle. I also had a head of cabbage and an oversized block of cabot cheddar and, as the weather gets colder, an unexplainable desire for cornbread.

For something so simple, I'm really bad at cornbread - without fail I either burn it, suck the moisture out of it or leave out a basic ingredient. This time I managed to somehow forget some significant portion of the sugar. I don't know if this is true, but it's the only thing I can think of that would've left me with bread of such a building material consistency. I was lucky enough that it was only a garnish in this case.

The soup was simple:
The leftover rice and beans went into a pot with the broth from the pot to simmer. Enough shredded chicken was added to keep every spoonful meaty; some extra salt, pepper and garlic went in for flavor, and a chopped head of cabbage that was wilting in the fridge (bok choy, in this case) went in with it all for the nutrients. Enough sharp cheddar got grated over the top of the hot pot to thicken the whole thing up nicely, and it was served with a few squares of the aforementioned not-so-great-but-piping-hot cornbread.

Monday, September 22, 2008

Chicken Week, Day 1: Rice and Beans

Angela said something over the weekend that stuck with me. "I don't understand why people look down on a boiled chicken." Coming on the heels of my friend Laurie describing a chicken soup recipe that to me seemed to be more chicken than soup and similarly boiled, well. It wasn't a challenge, but I figured I might as well take it as one.

I boiled a chicken last night, and as it was merrily bubbling away an idea formed.

We buy a lot of food in any given week - I love to screw around in the kitchen and we both love to eat, but more often than not a good portion of it ends up stowed in the back of the cabinet or prepared and frozen, never to be seen again. But the chicken in the pot is a substantial amount of protein - add that to the various starches and canned stuff in the pantry and I figure I can save us a sizable chunk of change this month by not going grocery shopping this week.

What the hell. Worst-case scenario, I don't fee like eating chicken for awhile.

For reference, I boiled the chicken in water and white wine with a handful of spices (basil, sage, bay leaves, garlic, celery salt and cumin) and a few almost-but-not-quite past their prime vegetables from the fridge (two onions, two carrots and a tomato). When I pulled the chicken out of the pot and separated it out into its component parts, I ended up with:
  • 1 whole chicken breast, slightly dry and shredded (most of it will go to sandwiches for lunch).
  • 2 legs, 2 thighs, 2 wings, still clinging slightly to their bones.
  • 8 cups half-strained stock, most of which went to the freezer.
  • a whole bunch of bones, cartilage and skin.
The dark meat and bones went back into a pot after resting in the fridge overnight - it was going to take some work to separate the meat from the other stuff so I figured boiling the hell out of the stuff again should make it easier to work with.

Dinner for the night ended up as this:
Rice and beans with a twist. Nothing particularly fancy, but the simplicity of it belies the satisfaction it produces. It's the South Carolina-style barbecue sauce that makes it.

Ingredients:
  • 1 cup white rice
  • 1 cup red beans
  • 2 cups chicken stock
  • 1 tbsp butter
  • 2 cups shredded dark meat chicken
  • 1 small onion, diced
  • 1/2 tsp garlic, minced
Sauce:
  • 1/2 cup brown mustard
  • 1/4 cup sugar
  • 1/8 cup brown sugar
  • 1/2 cup apple cider vinegar
  • 1/8 cup water
  • 2 tbsp butter
  • 1 tsp Tabasco
  • 1/2 tbsp paprika
  • 1/2 tsp black pepper
  • 1/2 tsp white pepper
  • 1/4 tsp cayenne
  • 1/2 tsp soy sauce
  • 1/2 tsp Worcestershire sauce
  • Sour Cream and cheddar cheese as garnish

The Gist:

Cook the rice with the chicken broth in one pot; boil the beans in another one with a tablespoon of butter and some salt and pepper in the water. The rice should take 30 minutes or so, and the beans (assuming you didn't soak them overnight; I didn't) should take between 45 minutes and an hour.

Meanwhile, heat some olive oil in a pan. Add the diced onion and the garlic and saute, then add the chicken. Heat through and set aside.

Combine the barbecue sauce ingredients in a small saucepan and simmer for 30 minutes or so.

Combine the three in whatever manner you see fit, top with sour cream and cheddar and serve.

This will feed 2-3, but it scales easily. It also produces a TON of leftover rice and beans; tune in tomorrow for what happens with them.

Wednesday, September 17, 2008

Ya can't make a BLT without B

I do not doubt, not for a minute, that this is a tasty sandwich, but co-optings of "BLT" seriously irk me.

I've experimented with improving the BLT, but none of those experiments have ever involved removing the bacon, roasting the tomato or replacing the lettuce with shredded bok choy - I've made my own mayonnaise (no real difference, but you can herb it), I've chilled the tomato in a freezer just before assembly (improves the overall texture), I've bought preservative-free smoked bacon from Vermont at local farmers' markets (truly incredible), I've even baked my own bread (still haven't really got the hang of it) but avocado has never entered into the picture. The tofu has stayed in the closet. Soy may make you strong and crush your enemies, but it ruins a BLT.

I mean, let's face it: in any other circumstance, lettuce and tomato is a garnish - turkey, lettuce and tomato isn't a TLT, it's a friggin' turkey sandwich. Raising another sandwich to a BLT level of perfection without some serious thought is sacrilegious.

A BLT should look something like this:
...or it absolutely doesn't count.

A recipe isn't really necessary, but some pointers never hurt.

  • Cook the bacon slowly and flip it often; bacon burns if you don't pay attention to it.
  • As I mentioned before, pop your tomato into the freezer before you start cooking the bacon. It will make it easier to slice and bracingly cold to the teeth.
  • And speaking of tomatoes, very, very lightly salting the slices can bring out their flavor, but too much salt will leave the bacon with nothing to do.
  • The lettuce shouldn't be too crunchy; you can avoid that by cutting out its central ribbing and by layering the leaves on top of each other.
  • You can compromise making your own mayo by blending regular mayo with herbs and / or garlic. Don't overdo it, though - the bacon should be the star of the show.
  • The bread should be light; toasted white or croissants work great.

Monday, September 15, 2008

Vegetarian, but not snooty about it

It doesn't take a genius to realize that different people have different nutritional requirements, but you can stretch that piece of common sense in an interesting direction: it's also true that different people have different requirements to feel satiated - I love a good green salad but no matter how much of it I eat I'm going to feel less satisfied than if I had something with, say, 12 ounces of steak on it.

Angela on the other hand is a carbohydrates disposal machine - she can deal with minimal amounts of protein but try to take away her risotto and your hand will come back as a bloody stump. It actually goes farther than that with her - meat is work to her, satisfying and rewarding work, but if she's had a bad day, plopping a roast chicken in front of her will only make things worse.

Cooking vegetarian isn't something I mind doing on occasion; one of my more tasty tricks is to use spinach where you would be using something heavier, and steaming it to retain its bulk. It doesn't go so far as emulating meat like tofu can, but it does a good job of making its absence less noticeable.

This:
...does a great job of highlighting that.

Ingredients:
  • 1 cup white rice
  • 1 cup water
  • 1 cup vegetable broth
  • 1/4 pound spinach
  • 1 small yellow onion
  • 1 tsp minced garlic
  • 1/4 cup water
  • 1/8 cup olive oil
  • 1/8 cup apple cider vinegar
pinches of:
  • salt
  • pepper
  • cumin
  • celery salt
  • paprika
The Gist:

Cook the rice in whatever manner you like, but instead of using twice the volume of rice in water, use half water and half broth. Vegetable broth is fine (and vegetarian, obviously) though chicken broth works fine, too.

While the rice is cooking, lightly char the sliced onion in the bottom of a medium saucepan with a little oil. You're going to be tempted to stir it; don't. You want that lightly charred flavor because you're going to be steaming it after this and you don't want all of the flavor to leech away.

Once the onions char (10 minutes or so; don't overdo it) put the spinach in the pot with the garlic and 1/4 cup of water. Wait for the water to boil, cover, and reduce heat to a simmer. Cook until the spinach is tender but still retains its liquids, about 8 minutes, give or take.

Serve with a drizzling sauce made up of the olive oil, vinegar and spices.

Prepared this way, it will serve two, though it doubles easily.

Thursday, September 11, 2008

Whistle a Happy...you know what? That's a truly awful pun. Never mind.

Sometimes I over-think things. Combine that with my urge to show off and sometimes I get bitten in the ass.

Take yesterday, for example. When going over what to eat for dinner with the girl, everything either of us felt like required one (usually embarrassingly basic) ingredient more than we had in the cupboard. If our cravings were strident and we were missing everything to make the dish in question except half a stick of butter and some salt, a trip to the market wouldn't feel so out-of-place, but to go out just to get pasta felt wrong.

So we (ie, she) decided that I should make one of the easiest meals available on short notice: tuna melts.

I mean, come on. The only tricky thing about a tuna melt is the Jenga-master reflexes necessary to keep the contents of the thing from sliding sideways out from its bread when flipping it over to toast its other side, and we have an extra-wide spatula specifically for flipping grilled sandwiches because I have excellent reflexes and terrible spacial coordination skills - I can catch a falling salt shaker in mid-air but will more often than not manage to stub my toe while setting it down on the counter.

Anyway. It seemed to me at the time that a good many restaurant tuna melts are one step behind where they should be because they use the same tuna for cold sandwiches as they do for hot, but that toasting the thing in butter fundamentally alters the way your teeth are going to interact with it. Fried bread is salty, crunchy and mildly sweet, so the tuna in question should be less salty, less crunchy and spicier than the stuff you'd be putting on toasted white.

So instead of yellow onions I used green ones (same flavor, less crunch), threw in some celery to make it just a little bit crunchy but less crunchy than the onions would have, halved the salt and doubled the pepper. And it was good tuna salad...and then I made two really silly mistakes: I put tomato on the thing, completely wrecking the balance I had crafted, and I forgot that a tuna melt is a very different beast than a grilled cheese when it comes to cooking it.

It was good, but it could've been better. I will admit, though:
...it takes one hell of a photo.

Ingredients:
  • 1 can solid white tuna, in water
  • 1 large handful green onion, chopped
  • 1 rib celery, finely chopped
  • 2-3 tsp. mayonnaise
  • 1-2 tsp lemon juice
  • pinch of salt
  • heavy shake of black pepper
  • 2 slices deli American cheese
  • Your choice of bread
  • 2 handfuls fresh leaf spinach
  • butter for frying
The Gist:

Combine the first 7 ingredients in a bowl; mix with a fork.

Melt some butter in a pan over low heat. This is the non-tomato-related thing I screwed up - grilled cheese, you can cook over medium because the cheese is always within a quarter-inch of the pan, and it's going to melt fast. But a tuna melt is a much more delicate thing. Fry it gently: you'll need to heat up the tuna and melt the cheese before you burn the bread.

Anyway. Put together your sandwich. From bottom to top it should go bread / tuna / spinach / cheese / bread, and it needs to go into the pan upside down first, with the cheese on the bottom. This will melt the cheese enough so that, when you flip the sandwich to fry the other side, the cheese will melt down into the spinach and the tuna.

If your heat is low enough, it should take 5-7 minutes to a side. If you can't hear it frying, you need more butter. If it starts to smoke, your pan is too hot.

You don't strictly need the spinach, but I like it. It tricks me for a little bit into thinking this thing is even remotely good for me.

One can of tuna prepared like this makes two melts with a bit left over.

Wednesday, September 10, 2008

Where's the Be...oh. There it is.

If you have access to a crock pot, stew is so stupidly easy to make it feels almost like a breach of contract not to make some around this time of year and eat it, and eat it, and keep on eating it until it's gone, by which time you probably won't ever want to fish the thing out of the closet ever again.

I call that 'tradition.'

I love a good stew, but only once or twice a year when the weather turns unexpectedly cold for the first time in September and maybe on a lazy weekend around Christmas. In July I'm more likely to throw some tuna salad on a roll and get the hell out of the kitchen rather than raise the temperature of our apartment even a little with my presence in it.

The weather turned a few days ago, just slightly but noticeably, and with it came a pit-of-the-stomach craving for autumn things, or at least for things I associate with autumn: corduroy floor pillows and saltines with cream cheese and Sunday afternoon football, and, of course,
...stew.

I've been trying to nail my father's stew recipe for years, and I never get it quite right. I think I came close this time, but I'm still missing something in the formulation that I can't quite put my finger on. I could just ask him, I guess, but I'd much rather come to him and proclaim that I've nailed it. Our relationship is like that.

In the meantime, this will do just fine. It'll make enough stew to stuff four people to the rafters.

Ingredients:

  • 2 pounds of cubed beef, lean but not too lean
  • 2 carrots, rough cut
  • 2 celery ribs, rough cut
  • 1 onion, rough cut
  • 1 large potato, rough cut
  • 8 mushrooms, whole or halved
  • 1 cup red wine
  • 1 cup water
  • 1 bay leaf
  • 1/2 tsp thyme
  • 1/2 tsp dry mustard
  • salt and pepper
The Gist:

I wasn't kidding about this being stupidly easy - take everything on that list, put it into a crock pot on low and it'll be done 8 hours later. The best way to take care of this is to arrange the ingredients in the pot the night before you want to eat it, stow it in the fridge until morning and put it on to cook before work; it'll be done by dinner.

You can also, as I did as an experiment, make herbed biscuits in the crock pot - drop spoonfuls of biscuit dough on top of the stew a half-hour before serving and turn the pot up to high - but realistically it makes the thing too heavy and starchy - the stew can support itself without any bready backup.

Monday, September 8, 2008

Culinary Transparency

The best thing about Chinese takeout, at least the kind found on almost every street corner in New York City, is that you're never more than 15 feet from your food, usually in a direct line of sight with it, as it's being cooked. It's the pure transparency of the thing that gets to me - restaurants with open kitchens are a comparatively new and trendy thing in the world of haute cuisine, but it's old hat to me. I'm not sure what does it, but food tastes better when you can watch it being prepared.

I've always been fascinated by how so few ingredients can make something so incredibly tasty as, say, fried rice, to the point where I sometimes get a craving that can be sated by four hours on a bus and nothing else.

I haven't done it on a whim yet, but don't tempt me.

At home, you can't beat a quick stir-fry for ease of preparation, but my only real problem with throwing a bunch of stuff into a wok and dizzying it up with a wooden spoon is how tired I get of the finishing sauces after awhile - most of the Chinese takeout sauces the American palette is typically familiar with and have easy access to fall into the rather generic collection of Sweet, Hot, Garlicky or (for lack of a better descriptor) White. It makes selecting from a menu easy (you identify a craving and run with it) but it doesn't do much if you're looking for a little subtlety, though to be fair I guess that's what I get for being cheap.

The sauce this recipe creates is a bit confusing until you get used to it - it's hot enough to clear out your sinuses, then garlicky at the back of the mouth before rounding out as sweet. I've included directions for this:
...a generic chicken stir-fry, but the sauce is the point. It's truly wonderful in its versatility - apart from being wonderful in a wok, it's great as a salmon glaze, as a chicken wing sauce (I can't recommend this enough, particularly if the wings are tossed lightly in sesame seeds as a finish) or as a salad dressing.

Sauce Ingredients:
  • 1/4 cup soy sauce
  • 2 tbsp butter
  • 1 tsp minced garlic
  • 1/2 tsp Huy Fong-brand hot chili sauce for spicy, 1 tsp for hot
  • 1/2 tsp brown sugar
  • 1/4 tsp ground ginger
  • 3 dashes black pepper
  • 2 dashes paprika
  • 1/2 dash white pepper
  • chopped scallions
Stir-Fry Ingredients:
  • base ingredients - I used a chicken breast, a handful of snow peas and a quarter onion
  • 1 tbsp vegetable oil
  • 1 tsp minced garlic
  • Heavy dash of soy sauce

The Gist:

Combine the sauce ingredients in a small saucepan over low heat, stirring occasionally, until it bubbles.

Heat the oil in a slope-sided pan until spitting hot. Add the stir-fry ingredients and stir constantly until cooked through. Take off the heat when finished, drain any excess liquids and return it to the pan over medium heat.

Pour the sauce over the stir-fry and toss to combine (don't burn the sauce). Serve over rice.

Considerations:
  • Huy Fong-brand Thai chili sauce is a truly amazing sauce that I'd recommend you keep a bottle of on-hand, but tolerances for it vary by the individual; try it out before you commit, and add it slowly.

Saturday, September 6, 2008

Ding!

We have a microwave in our kitchen. The operative words there are our and we, of course - if I had my way, if I had a choice, if I had a little gumption and a pocket with sixteen spare dollar bills in it (and, realistically, if I were a completely different person) I'd screw some feet to the thing to turn it into a step-stool and replace it with one of these:
...because unlike the microwave, that timer is sophisticated enough to count backwards from 3,600 twice at the same time.

(Available for sale at uncommongoods.com; link courtesy of boingboing.)

Thursday, September 4, 2008

Tea for Two

My Grandmother drank tea the way young people drink beer.

The deal was, it seemed to me at the time, that she made a pot of it (she was the only person I'd ever seen make tea in an actual pot outside of restaurants) and we couldn't end our visit until the pot was empty. She would ask if my mother would like something, maybe some tea, and Mom would say no but never all that insistently because Eva would be up and out of her chair on the way to the stove to grab the kettle (not the same as the pot, I learned) before the first syllable was out of her mouth. Somewhere between Want and Some, the kettle would be filled, the burner would be lit, and any protestations my mother would make wouldn't actually change Eva's movements at all, so she didn't really bother.

Her kettle didn't whistle, but you could hear the water boiling halfway across the apartment.

I like tea because of Eva's tea; no tea tasted like hers. She was an O'Hara, and while her son (my father) claims no relationship to her Irish heritage, preferring to think of himself as German, I've been drinking sweet, milky, buttery tea since I was seven or eight. The German part of me didn't have a prayer against that kind of genetic weight, bound solid with a plea to a child's sweet tooth.

After Eva died (this was years and years ago) I went looking for tea that tasted like that, but nothing I found came close.

Before last Christmas, when I knew I would be moving to Massachusetts, Mom asked me if there was anything from my family's kitchen I wanted to take with me.

I wanted their set of these:
They were Eva's. I drank out of them as a kid at her kitchen table, then at my dining room table. Their bottoms are scratched deep with silver from the tips of thousands of spoons.

When I unwrapped them on Christmas Eve, I remembered to ask Mom what kind of tea Eva drank.

Turns out, it was Lipton's. Just Lipton's. Nothing fancy, nothing smuggled from the old country in the bottoms of suitcases, just generic tea that, as my mother told me, Eva would load down with cream. In my adult life, I'd only ever had it with milk.

I keep cream in the fridge. If in my writing here I ever call cream a staple, a necessity, a thing never-to-be-without, that's why - because sometimes I want to have a cup of tea with my Grandmother, and when I do milk just won't cut it.

Tuesday, September 2, 2008

Broth Matters

At some point when I wasn't looking, broth became a steak delivery system.

Don't get me wrong; I positively adore steak delivery systems; most of the time, I am one. But broth should be hearty more-or-less on its own - you don't need to put an entire chicken in it to make it taste like something.

Part of it is an expectations game - pre-made soup companies nowadays focus on the stuff floating in the broth instead of the broth itself. This is fine, I guess, but it's gotten to the point where the broth in a can of hearty soup isn't anything more than salt water with beef concentrate in it. It's a shame, and it's a bit of a nomenclature problem - maybe it's just me, but soup that's more ingredients than stock isn't soup; it's stew.

Broth matters. And I, for one, think it's about time that some attention was paid to it.

This:
...is about as much attention as broth can possibly get while still being graced with some bulk. The potatoes work in conjunction with the gelatin from the bones as a thickener without having to use flour (which can get messy) and the mushrooms mostly act as a broth concentrator.

A nice side effect of this recipe is, like most soups, it's made up of things you probably would have thrown away if you weren't thinking ahead. Remember when I said it's smart to buy whole chicken wings for frying and save the tips? This is where the tips go. I can feed 3-4 people with this recipe and all it will cost me is a handful of vegetables, some scraps from the freezer and some spices.

Ingredients:

Stock:
  • 2-4 pork chop bones, depending on size
  • 12 chicken wing tips
  • 2 whole cloves garlic
  • 1 onion, peeled and quartered
  • 2 celery stalks, roughly cut up
  • Enough water to fill a medium pot
  • 1/2 tsp paprika
  • 1/4 tsp cumin
  • salt and pepper
Bulk:
  • 2 potatoes, cubed
  • 6-8 mushrooms, roughly chopped
  • green onion as garnish
The Gist:

Combine the stock ingredients in a big pot. Bring to a boil before reducing the heat to provide an energetic simmer. Simmer covered for an hour or so, then remove the lid and continue simmering.

When the liquid volume has halved itself (30 minutes to an hour, depending), top it off with water. When it's halved itself again, run the liquid through a strainer, discard the solid ingredients and put the stock in the fridge overnight.

Come the next day, you'll find that the stock's fat has risen to the top of the pot and solidified. Skim it off with a ladle.

An hour or so before serving, add the potatoes and mushrooms to the pot and return to a simmer. Heat until the potatoes are soft, ladle into bowls, garnish with green onion and serve with buttered bread.

Considerations:
  • Don't let the stock boil for too long before letting it simmer - boiling the bones too roughly will lead to a bitter stock. Be gentle with it and your stock will remain hearty and mildly sweet.
  • We (at least, I) have become used to salty soups, but the purpose of this one is to showcase the broth; go easy on the salt and let the stock speak for itself for a change.
  • I haven't tried it yet, but I think this soup would be amazing with tofu substituted for half or all of the potatoes.

Monday, September 1, 2008

On a Wing and a Prayer

Making food easy to eat can be a pleasure, a pleasure akin (I imagine) to cutting the crusts off your kid's sandwiches before school.

(Off-topic and slightly embarrassing fact - the first time I made Angela a sandwich, I asked her in which direction she wanted it cut in half and whether I should remove her crusts for her. If you ever want somebody to fall for you, that's apparently a good question to start with.)

But sometimes difficult food is a virtue - a good steak isn't anywhere near as satisfying if you don't cut into it yourself; pancakes arriving at your diner table with maple syrup already on them would (rightly) cause a minor riot; cotton candy has to be bigger than your face or it absolutely doesn't count.

We like to play with our food, and sometimes it's actually within societal norms to do it.

The epitome of this ethos, though, is difficult food that's easy to prepare, and the perfect example of this, at least in the moment, is:
Buffalo wings. They cover you in sauce, they're delicious and they require very, very little work, at least by my definitions.

This recipe is a slight variation of a recipe that is available all over the internet (though for reference, my working copy came from CDKitchen.com) that supposedly has managed to escape from the Anchor Bar, the self-proclaimed home of buffalo wings in Upstate New York. How authentic it is, I would love to know, but it's tasty by any standards.

My version is less salty, slightly less spicy and more flavorful than the ones I've found; feel free to futz around with the proportions (it's a lot of pinches and dashes anyway) but keep this in mind: if you want to make it less spicy but want to keep its body, add more Frank's, not less tabasco, and vice versa. It's backwards, but it works.

Ingredients:
  • 12 chicken wing pieces (6 drumettes, 6 of the other kind)
  • 4 tablespoons Frank's Hot Sauce
  • 2 tablespoons margarine
  • 1 teaspoon apple cider vinegar
  • 1/2 teaspoon Tabasco
  • Splash of Worcestershire Sauce
Heavy Pinches of:
  • Cayenne pepper
  • Paprika
  • Black pepper
Pinches of:
  • celery salt
  • garlic powder
The Gist:

Fair warning - you're going to be deep-frying these wings. You can bake them if you want, but I've done both and frying them tastes leagues better.

Heat two inches of oil (soybean, canola or peanut; I like soybean) in the bottom of a big pot to 375 degrees F. Drop the halved wings gently into the oil and stand back; they're gonna spit like crazy.

While they're frying, combine all of the rest of the ingredients in a small pot until warm; cover and turn off heat.

Pull the wings from the oil with metal tongs when finished (it should take 12-15 minutes or so - the outer parts of the wings should be brown and crispy) and dry them on paper towels. Put them in a bowl, pour the sauce over them and toss to cover. Serve with bleu cheese dressing and celery.

Considerations:
  • You're working with hot oil. For the love of all that's holy, be careful. If you have pets or kids, lock them out of the kitchen. Make sure your tools are clean and dry before you start. Get a spatter shield. Stand back as you add the wings to the oil and add them gently to keep spatter to the minimum. Don't reach over or around the oil for any reason. Don't move the pot from one burner to another (or anywhere else) until the oil is room temperature. Learning how to safely deep fry is worth it (ever want to make your own french fries?) but please be smart about it.
  • You can get wings split up into pieces at the market, either fresh or frozen, but I like to cut them up myself - apart from it being a bit cheaper and dirt simple, you also get the wing tips which are great for soup stock. Use a pair of kitchen shears and split them at the joint; fry what you want and freeze the rest for later.
  • You can make your own bleu cheese dipping sauce, but before you do: go to the market and get the cheapest generic-brand bleu cheese dressing you can find (I get bottles that last through fifty wings without rationing for a buck fifty) and try that. I can practically guarantee that no dipping sauce you make will improve on it without making the hassle totally not worth it. I mean, have you ever worked with bleu cheese? It's like trying to cut a block of semi-frozen mayonnaise.
  • And on the subject: don't be stingy with the dipping sauce, and serve it on ice. Nothing sucks more than running out of bleu cheese before you run out of wings, and it doesn't have the same effect warm. Get a glass bowl, fill it with ice, and put a little ceramic pot filled with cheese in the middle with celery around it. It's worth it.