Monday, November 24, 2008

The Devil You Know

I didn't think I liked deviled eggs. I didn't have a reason really, except that they had been categorized in my head next to the other foods that seemed to surface at holiday parties my grandparents threw when I was a kid that I refused to eat - pickled beets in particular. There was something about the consistency of the eggs, slimy whites and chalky yolks, ice cold and impossible to pick up, let alone eat, that didn't do much for me.

That was 20 years ago, and I figured not long ago that I should give the things one last shot. I'm glad I did, because in the process I found yet another use for one of my favorite things: pastrami.

When I broached the idea of putting meat into deviled eggs to some friends at a get-together I threw a few weeks ago, they reacted with universal...let's call it suspicion, though it might've been closer to disgust. It isn't that weird an idea, though - hard-boiled eggs have been intrinsically paired with ham for years and years and pastrami, though not a pork product, shares a lot of the same characteristics with ham while being a little subtler, a little spicier and slightly less versatile.
This recipe is perfectly tasty without the pastrami though, so leave it out if you must. Keep in mind, though, that you might have to increase the quantity of salt to compensate.

Ingredients:

  • 6 Eggs
  • 1 heavy pinch of salt
  • 3-4 slices deli pastrami, chopped
  • 1/2 tbsp butter

  • 1/2 handful Green Onions, chopped
  • 1 tbsp Mayo
  • 1 tsp Dijon Mustard
  • 1/4 tsp Lemon Juice
  • 1 tsp Tabasco
  • Salt and Pepper to taste
  • Paprika
The Gist:

Hard-boil the eggs. There are as many ways to this as there are people who make them, but I actually like Emeril's method - cover the eggs with water in a pan, bring them to a boil over medium heat, boil for 2 minutes, remove from heat, cover, and let sit for 11 minutes before cooling and peeling.

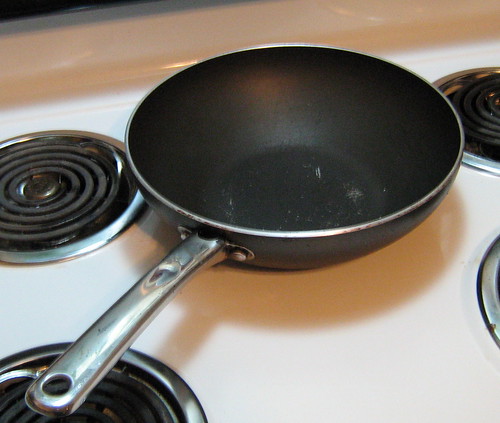
Fry the chopped pastrami in a pan with the butter until crispy while your eggs are cooling.

Cut the hard boiled eggs in half lengthwise and remove and reserve the yolks in a bowl. You can use a spoon for this but if you're careful and if the eggs are cooked just right, you can pop the yolks out of the egg halves with your fingers without damaging the whites.

Mash the clumps out of the yolks with a fork. Add the rest of the ingredients and mix well. Spoon the yolk / mayo mixture back into the yolk shells, dust with paprika and chill in the fridge until serving.

Tuesday, November 18, 2008

Hot Potato

Of all the foods in the diner breakfast pantheon, it's hash browns that deserve more attention; what with bacon hogging the spotlight (looking back, that's a truly awful pun; sorry about that), even sausage has been relegated to the background, coming to prominence only infrequently on things like biscuits, but the minimal attention paid to sausage puts it on the C-list compared to the scoop-it-off-the-grill-and-forget-about-it nature of breakfast potatoes.

Potatoes have, in general, been stuck at the side of the plate for too long, which is a shame considering all the tasty things you can do to them - they're even good boiled, a fate I wouldn't usually reserve to the blandest of foods.

To hell with that, I say. Attention must be paid to potatoes, and breakfast is as good a place as any to start.
The diner breakfast trifecta is familiar the country over - eggs on one third of the plate, meats on another third and potatoes on the remaining third. This recipe brings the starch to the forefront by putting it smack-dab in the middle of the plate with everything else catering to it, for once. You'll notice that the proportions are similarly balanced in the potatoes' favor as well.

Ingredients:

  • 1 mediumish potato, cubed
  • 1/2 onion, diced
  • 1 tbsp olive oil
  • 1 tbsp butter
  • Pinches of Rosemary, Parsley and Thyme
  • Dashes of Paprika and Celery Salt
  • Salt and Pepper
  • 1 Egg
  • 1 tbsp half-and-half
optional:

  • 1 cup (or so) sliced smoked hot Chorizo
  • 2 dashes of Louisiana hot - Frank's, etc.

The Gist:

Melt the butter in a pan with the olive oil over medium heat, and throw in the potato and onion once the butter is bubbling. Toss to combine.

Potatoes are hardy starches - you're going to have to cook them for awhile at a relatively low temperature to simultaneously cook them and keep them from burning, about 10-15 minutes should do it. Add the spices and chorizo (if you went that way) halfway through - if you ever wondered what makes diner hash browns that distinctive slight-orange color, by the way, it's the butter and the paprika.

Once the potatoes are cooked, beat an egg with the half-and-half, pinches of salt and pepper and, if you like, the hot sauce. Pour into the pan directly over the potatoes and tilt the pan around for an even distribution. Don't touch it after that, just let it cook for 3 to 4 minutes. The eggs will be cooked through but slightly soft on one side, the potatoes will be fork-tender and the sausage will be warm and slightly crispy.

Serve with coffee and, if you think you can deal with the added starch, toast.

Notes:

  • Chorizo translates to "sausage," but in practice (in the United States at least) Chorizo is almost always sold smoked, not raw. If the chorizo you have is raw, you'll need to cook it first.
  • Sour cream can be substituted for the half-and-half. So can water; it's just a stretching agent.
  • And speaking of sour cream, it works wonders here as a garnish.
  • So does grated cheddar.
This recipe results in a diner-sized portion - I can eat this much by myself without so much as blinking, though you could probably feed two normal people with it. If you're cooking for two hungry people, add another egg and you should be fine. I serve it on one plate with two forks, but that's me.

Friday, November 7, 2008

Hiatus?

Sorry for the lack of posting recently - Angela was in Europe for two weeks and the camera was with her, and the pics-or-it-didn't-happen nature of food blogging kinda defeated the purpose.

She's back. Expect some tastiness soon.

Monday, October 6, 2008

Would you, could you, in the rain?

Angela's parents came over to visit this past weekend and I went into a bit of a panic - she thought it was no big deal: just clean to parentally-acceptable levels (which aren't that far from the everyday anyway) and make sure we have seltzer in the fridge. Sounds great in theory, but I started worrying about the menu.

Visits to my family revolve around food - before I've even got my bag off of my shoulder after walking through the door to my parents' apartment, my father starts talking about what's in the freezer, or marinating, or left over from last nights' dinner. For me to show up at a family member's house without there being food (or at the very least, beer) on the table is unthinkably foreign.

All sorts of equivocating on my part went into the thing, but the long and the short of it was, we ended up getting an eight-pound ham and went out to a diner for breakfast anyway. The diner was the plan from the beginning (I had missed that part) and the ham was on sale.

Even when you discount the bone, eight pounds is a lot of ham. The bone will go into split pea soup but the trimmed meat is going to be making its way into pretty much everything this week - sandwiches, pasta sauces, mac 'n cheese, but the most satisfying addition to me is to scrambled eggs.
I don't want to annoy the bacon lovers in the audience but eggs and ham, green or not, match better on a plate than bacon and eggs do - the ham negates the need for both salt and pepper at the table, melds better with onions and cheese, and can be fried in butter without going over the top. Plus, you can cube it; try that with a slab of bacon.


Ingredients:

  • 1 1/2 cups cubed ham
  • 3 eggs
  • 1/4 cup shredded american or cheddar cheese
  • 1/4 cup chopped onion
  • 2 tbsp cream or milk
  • 2 tsp butter
  • Splash of hot sauce (Tabasco or Louisiana Hot)
  • Green onions to garnish
The Gist:

Melt the butter in a pan over medium heat. Add onions and ham and fry until both are lightly browned.

Scramble the eggs in a bowl with the milk or cream; add to the pan. Tip the pan back towards you and scrape the egg away from you so it keeps moving over the heat, cooking slowly. Be patient. Add hot sauce and cheese as you cook the eggs. Keep it moving until the eggs are almost but not quite cooked through and plate immediately - they'll finish cooking on the plate. Top with green onions.

Serve with toast, orange juice and coffee or, if you're like us, just plop the thing down on a table and stick a couple of forks in it. Serves 2 if you feel like sharing.

Thursday, October 2, 2008

Thatsa Spicy Meataball

At the risk of giving up every Italian grandmother's secret, I need to tell you: there's nothing magical about pasta sauce. The memories associated with it, sure, I know the drill: giant copper pots, wooden spoons, big bunches of herbs, clouds of steam whenever lids are lifted, but the ingredients themselves are almost always the same no matter who you ask. The food is secondary.

Just because it isn't magical, though, doesn't mean that there isn't a trick to it. I admit that there's a trick to my pasta sauce just like everybody else's but it's something more fundamental than a pinch of sugar, a dash of hot sauce or using sweet basil instead of regular basil: instead of using large amounts of different kinds of ground meats, I use a combination of lean beef, fresh spinach - tomatoes are nice by themselves and all, but a real meal needs vegetables in it, preferably green ones - and mushrooms: there's something about a spinach-mushroom combination that satisfies my stomach almost exactly the same way meat does. It's textural, definitely, but beyond that I can't say.

I should probably warn you before you start clearing out space in your freezer that I don't make sauce by the gallon, either - I used to do that until I realized two things: that, not having an Italian grandmother's genes coursing through my veins, I just don't eat that much pasta and sauce and that, while this sauce is great on pasta it's awful on pizza - pizza sauce is a base not a main attraction, and needs to be salty, finely textured and mostly ignorable. Pasta sauce, on the other hand, needs to weigh down your fork and doesn't need to be spread over much.
This recipe will feed 3-4 depending on if anybody wants seconds. It's also horribly imprecise because grandma did get one thing right - you need to be adding spices a bit at a time until it tastes right, and it's a pain to measure. I've made it as easy as I can.

Oh, and making this vegetarian is a snap: just replace the beef with another handful of spinach. It tastes fantastic either way.

Ingredients:
  • 1 small yellow onion, diced
  • 2 cloves garlic, coarsely chopped
  • 1 tbsp olive oil
  • 1 small can tomato paste
  • 1 regular-sized can diced tomatoes
  • 1 cup water
  • 6-8 oz. 93% lean ground beef
  • 2 big handfuls fresh leaf spinach, stems removed
  • 1 big handful sliced mushrooms
  • 1 tsp white sugar
spices:

Largest amounts of:
  • oregano
  • thyme
  • garlic salt
  • paprika
  • parsley
Smaller amounts of:
  • red pepper flakes
  • cumin
  • celery salt
  • cayenne pepper
  • basil
The Gist:

You'll need two medium saucepans. In the one, combine the tomato paste, the diced tomatoes, the water, the sugar and the spices. put over low heat to simmer. In the other, saute the onions and garlic in the olive oil until translucent. Add the beef and cook through. There shouldn't be much grease in the pan; add the contents to the sauce pot and stir to combine.

Steam the spinach with water and a little bit of olive oil in the pot that used to have the beef in it over medium heat until it has halved in size, about 5 minutes. Add it to the sauce pot.

Saute the mushrooms in a little bit of olive oil in the same pot over medium heat until they give up their moisture, about 5 minutes. Add them to the sauce pot.

Cook the sauce over low heat, stirring occasionally, until you're ready to serve. Spoon over pasta and top with grated Parmesan cheese.

Tuesday, September 30, 2008

Currying favor

So I opened the cabinet to see what I could do about dinner and realized that, while we had come in under budget this week when grocery shopping, we had missed a few things. Important things like meat.

That's not strictly true, of course - the butcher's department is my favorite part about grocery shopping and a trip to the market isn't quite fulfilling without some quality time spent poking through the ground beef trying to find the elusive packages of 90% lean (perfect for burgers - 85% is too fatty and 93% doesn't have enough fat to taste like anything much) but the chicken breast we picked up I had already boiled for sandwich meat for the week (more on that in a couple of days), the shrimp vanished Saturday during a cocktail sauce experiment and the stew meat had ended up in a fantastic chili on Sunday night.

Change of plans, then - I went about seeing what I could do to clear out the fridge.

- - -

I have one memory of preschool, and that's of celery sticks with peanut butter or cream cheese in the middle. I could have sworn it was a family thing but when I mentioned it in passing to my father he steadfastly claimed to have never heard of such a thing. Despite the pleasantness of the memory, I'm not a big fan of celery unless it's served next to a heaping pile of buffalo wings or boiled to hell and back in a soup. Something about the texture rubs me the wrong way.

Why do I mention this? Guess what caught my eye when I opened the fridge - celery with an inch of life left in it, and a jar of peanut butter on its last legs. Ah well.

But then I got to thinking: Celery goes with peanut butter. Peanuts are used heavily in Thai food. Thai food leans heavily on curry. Curry is all spices and time, I've got plenty of both and I hate, absolutely hate, wasting food.

So here you go -
- a simple peanut and celery curry. It's hot enough to make your skirt fly up and it goes really, really well with a nice, slightly bitter beer (which, conveniently, I've also got in the fridge.)

I love it when a plan comes together.

Ingredients:

  • 3 celery ribs, roughly chopped
  • 1 small yellow onion, roughly chopped
  • 2-3 heaping tbsp peanut butter
  • 2 tsp salted butter
  • 1 tsp olive oil
  • 1 tsp minced garlic
  • 2 cups broth; I used chicken, though vegetable would work fine, too
  • 1 tbsp curry powder
  • 2 tsp brown sugar
  • 1 tsp cumin
  • 1 tsp chili powder
  • 1 tsp dry yellow mustard
  • 1 tsp paprika
  • 1 tsp white pepper
  • 1 tsp black pepper
  • 1 tsp dried parsley
  • 1/2 tsp tarragon
  • 1/2 tsp cinnamon
  • Salt to taste
optional:
  • 1/2 cup toasted pine nuts (I had them left over from a pesto gone wrong, so I figured what the hell)
The Gist:

Lightly brown the celery, onion, and garlic in the butter and olive oil in the bottom of a stock pot with a pinch or two of salt. Add the broth, the peanut butter, the pine nuts if you went that route, and the spices. Heat slowly over medium heat, stirring frequently, until it starts to bubble. Keep stirring for a minute or two - the peanut butter is going to take some elbow grease to mix in completely.

Once it's all combined, cover and reduce heat to low. Not medium-low; practically nonexistent low - the peanut butter is going to slowly sink to the bottom of the pot and if it's too hot it'll burn.

The longer you simmer it the better it will taste, but keep an eye on it and stir it every 15 minutes or so. It'll be done in 45 minutes, tasty in 60 and fantastic in 90.

Serve over rice. Feeds 3-4 people depending on their love of curry.

Monday, September 29, 2008

Fry me to the moon

We thew a little get together this weekend, nothing fancy - chili and beer and, once things got rolling, some deep frying action. The chili was pretty damn good but it's going to take some time for me to figure out what the hell I did, so in the interim: French fries.

Deep frying has a bad rap, deservedly so from a heath perspective, but come on. Nothing is tastier on a late spring afternoon than a burger with homemade fries.

This is my father's recipe, which is probably as simple as you can get. The equipment, however, is less standard but pretty damned important. so here goes.
You'll need a large pot with high vertical sides to keep the oil in. You'll also need a thermometer, a metal slotted spatula or metal tongs, paper towels and a small pile of newspaper or, failing that, more paper towels.

Some notes on this stuff: Cast iron is best because you're going to be heating the oil to a very high temperature and cast iron stands up to that best, though the size is more important than the material. You'll need a multipurpose kitchen thermometer - a meat thermometer won't do you any good because most of them only go up to 200-something degrees Fahrenheit and that's not gonna cut it. And you'll need a metal slotted spatula because the slots will let the excess oil out and the metal won't melt in the oil. You'll also need some frying oil (corn, vegetable or peanut, not olive. Olive oil will burn before you get it to a high enough temperature) and, I guess, some potatoes.

Skin your potatoes if you want (I don't), slice 'em how you want 'em and leave them in a bowl of ice water for 45 minutes or so - this will wick away some of the potatoes' starch and make 'em crispier when they actually go in the oil. Pour about three inches of oil into your pan, and heat it to 325F over medium-high heat. Don't crank it all the way, as you want to make sure it heats relatively evenly. You don't have to stir it, but keep an eye on it. Its temperature will rise exponentially, so start getting ready when it hits 300 degrees fahrenheit or so.

heating oil always scares me, and it damn well should scare you. It's probably obvious, but for the record (again): be careful. hot oil can cause serious damage to you, to your pets, to your children and to anything else it comes in contact with. Don't ignore it and stay clear and please, for the love of all things holy, keep your utensils clean and dry - clean so that whatever might be stuck to them doesn't contaminate the oil and dry so the oil doesn't spit when you're fishing around for the potatoes.

There are some tricks to knowing when the oil's ready if you don't have a real thermometer, but most of those, like flicking some water (or, if you're my father, spit) into the oil to see if it bubbles on contact, are imprecise or gross. Those tricks are good at telling if the oil's hot enough, but bad at telling if it's too hot - overheated oil will burn the outsides of your fries before the insides are done, and it's best to avoid that. It will also smoke, which is an eye irritant even if you can't actually see it in the air.

Once your potatoes have soaked and your oil's at the right temperature, pat them dry with a paper towel and gently slide them into the oil. They'll spit like mad, so stand back. You're going to have to do this in batches to make more than a single serving of fries, but you're not cooking them for that long and you'll get into a groove fairly quickly. Fry the potatoes for 4-5 minutes, turning frequently. When they've reached a golden-brown (which can be hard to judge right, but you'll get the hang of it) pull them out.

You're not done yet: the trick to good fries is to fry 'em twice. Crank up the oil's temperature to 375F. Once it's there, drop your fries back in for 2-3 minutes. The second frying will crisp the outsides of the fries to keep 'em from getting mushy. Pull them out and drop them into a thick rolled up cone of newspaper or into a wooden or metal (not plastic) bowl lined with paper towels. The newspaper will absorb the surface oil without pulling the oil out of the centers of the fries, leaving them moist.

Salt prodigiously and serve immediately. A potato and a half will comfortably serve one person as a side, double it otherwise. Multiply as required. And if you have a massive coronary, it ain't my fault.

(If this looks familiar, a different version of this was originally posted here.)

Friday, September 26, 2008

Chicken Week, Days 3-5: I blew it.

I tried to make the chicken last a week, I really tried, but two things came around and bit me in the ass: chicken bones and a bored palate.

The bones were totally my fault - it turns out, if you boil a chicken down to a shreddable consistency, you're going to end up with teeny, tiny little bones in every bite that, because they've been floating around in hot water for hours and hours, don't crunch so much as get gooey and melt. It isn't appetizing; after day 3 (I made fried rice, sorta, pictured above, which looked much, MUCH better than it tasted), and prodded by Angela with the suggestion of dinner and a movie (a suggestion I latched onto with an inappropriate degree of force) I decided to let the experiment die.

The bored palette, well. I should've known it was going to be an issue. Angela was fine with it, but I got fed up halfway through dinner on Wednesday and made myself a sandwich. Game over, man.

I did learn a couple of things, though:

  1. A whole chicken is fine to eat but a mess to boil. Next time, I'm getting a breast instead - its edibile bits-to-structuring ratio is much more acceptable, the cost isn't too much different if the breast is on sale and you make a portion of that back by not having to deal with the bones and whatnot.
  2. Likewise, boiled chicken breast makes for amazing sandwiches, and a bunch of them - that chicken breast made 6 lunches which is better than I usually get with a pound of meat from the deli - its texture helps fill out a roll better, or something.
  3. Shredded dark meat, if you're not going to eat it right away, gets a paste-like consistency in the fridge if you let it sit for a day or two. It's still perfectly safe to eat but the individual strands of meat start congealing. I'm big on pleasant textures and that wasn't one.
So that's it for that experiment. The next time we decide to play it cheap, I'll do some planning. Maybe.

Wednesday, September 24, 2008

Chicken Week, Day 2: Soup

After last night I had more rice, beans and shredded chicken than I knew how to handle. I also had a head of cabbage and an oversized block of cabot cheddar and, as the weather gets colder, an unexplainable desire for cornbread.

For something so simple, I'm really bad at cornbread - without fail I either burn it, suck the moisture out of it or leave out a basic ingredient. This time I managed to somehow forget some significant portion of the sugar. I don't know if this is true, but it's the only thing I can think of that would've left me with bread of such a building material consistency. I was lucky enough that it was only a garnish in this case.

The soup was simple:
The leftover rice and beans went into a pot with the broth from the pot to simmer. Enough shredded chicken was added to keep every spoonful meaty; some extra salt, pepper and garlic went in for flavor, and a chopped head of cabbage that was wilting in the fridge (bok choy, in this case) went in with it all for the nutrients. Enough sharp cheddar got grated over the top of the hot pot to thicken the whole thing up nicely, and it was served with a few squares of the aforementioned not-so-great-but-piping-hot cornbread.

Monday, September 22, 2008

Chicken Week, Day 1: Rice and Beans

Angela said something over the weekend that stuck with me. "I don't understand why people look down on a boiled chicken." Coming on the heels of my friend Laurie describing a chicken soup recipe that to me seemed to be more chicken than soup and similarly boiled, well. It wasn't a challenge, but I figured I might as well take it as one.

I boiled a chicken last night, and as it was merrily bubbling away an idea formed.

We buy a lot of food in any given week - I love to screw around in the kitchen and we both love to eat, but more often than not a good portion of it ends up stowed in the back of the cabinet or prepared and frozen, never to be seen again. But the chicken in the pot is a substantial amount of protein - add that to the various starches and canned stuff in the pantry and I figure I can save us a sizable chunk of change this month by not going grocery shopping this week.

What the hell. Worst-case scenario, I don't fee like eating chicken for awhile.

For reference, I boiled the chicken in water and white wine with a handful of spices (basil, sage, bay leaves, garlic, celery salt and cumin) and a few almost-but-not-quite past their prime vegetables from the fridge (two onions, two carrots and a tomato). When I pulled the chicken out of the pot and separated it out into its component parts, I ended up with:
  • 1 whole chicken breast, slightly dry and shredded (most of it will go to sandwiches for lunch).
  • 2 legs, 2 thighs, 2 wings, still clinging slightly to their bones.
  • 8 cups half-strained stock, most of which went to the freezer.
  • a whole bunch of bones, cartilage and skin.
The dark meat and bones went back into a pot after resting in the fridge overnight - it was going to take some work to separate the meat from the other stuff so I figured boiling the hell out of the stuff again should make it easier to work with.

Dinner for the night ended up as this:
Rice and beans with a twist. Nothing particularly fancy, but the simplicity of it belies the satisfaction it produces. It's the South Carolina-style barbecue sauce that makes it.

Ingredients:
  • 1 cup white rice
  • 1 cup red beans
  • 2 cups chicken stock
  • 1 tbsp butter
  • 2 cups shredded dark meat chicken
  • 1 small onion, diced
  • 1/2 tsp garlic, minced
Sauce:
  • 1/2 cup brown mustard
  • 1/4 cup sugar
  • 1/8 cup brown sugar
  • 1/2 cup apple cider vinegar
  • 1/8 cup water
  • 2 tbsp butter
  • 1 tsp Tabasco
  • 1/2 tbsp paprika
  • 1/2 tsp black pepper
  • 1/2 tsp white pepper
  • 1/4 tsp cayenne
  • 1/2 tsp soy sauce
  • 1/2 tsp Worcestershire sauce
  • Sour Cream and cheddar cheese as garnish

The Gist:

Cook the rice with the chicken broth in one pot; boil the beans in another one with a tablespoon of butter and some salt and pepper in the water. The rice should take 30 minutes or so, and the beans (assuming you didn't soak them overnight; I didn't) should take between 45 minutes and an hour.

Meanwhile, heat some olive oil in a pan. Add the diced onion and the garlic and saute, then add the chicken. Heat through and set aside.

Combine the barbecue sauce ingredients in a small saucepan and simmer for 30 minutes or so.

Combine the three in whatever manner you see fit, top with sour cream and cheddar and serve.

This will feed 2-3, but it scales easily. It also produces a TON of leftover rice and beans; tune in tomorrow for what happens with them.

Wednesday, September 17, 2008

Ya can't make a BLT without B

I do not doubt, not for a minute, that this is a tasty sandwich, but co-optings of "BLT" seriously irk me.

I've experimented with improving the BLT, but none of those experiments have ever involved removing the bacon, roasting the tomato or replacing the lettuce with shredded bok choy - I've made my own mayonnaise (no real difference, but you can herb it), I've chilled the tomato in a freezer just before assembly (improves the overall texture), I've bought preservative-free smoked bacon from Vermont at local farmers' markets (truly incredible), I've even baked my own bread (still haven't really got the hang of it) but avocado has never entered into the picture. The tofu has stayed in the closet. Soy may make you strong and crush your enemies, but it ruins a BLT.

I mean, let's face it: in any other circumstance, lettuce and tomato is a garnish - turkey, lettuce and tomato isn't a TLT, it's a friggin' turkey sandwich. Raising another sandwich to a BLT level of perfection without some serious thought is sacrilegious.

A BLT should look something like this:
...or it absolutely doesn't count.

A recipe isn't really necessary, but some pointers never hurt.

  • Cook the bacon slowly and flip it often; bacon burns if you don't pay attention to it.
  • As I mentioned before, pop your tomato into the freezer before you start cooking the bacon. It will make it easier to slice and bracingly cold to the teeth.
  • And speaking of tomatoes, very, very lightly salting the slices can bring out their flavor, but too much salt will leave the bacon with nothing to do.
  • The lettuce shouldn't be too crunchy; you can avoid that by cutting out its central ribbing and by layering the leaves on top of each other.
  • You can compromise making your own mayo by blending regular mayo with herbs and / or garlic. Don't overdo it, though - the bacon should be the star of the show.
  • The bread should be light; toasted white or croissants work great.

Monday, September 15, 2008

Vegetarian, but not snooty about it

It doesn't take a genius to realize that different people have different nutritional requirements, but you can stretch that piece of common sense in an interesting direction: it's also true that different people have different requirements to feel satiated - I love a good green salad but no matter how much of it I eat I'm going to feel less satisfied than if I had something with, say, 12 ounces of steak on it.

Angela on the other hand is a carbohydrates disposal machine - she can deal with minimal amounts of protein but try to take away her risotto and your hand will come back as a bloody stump. It actually goes farther than that with her - meat is work to her, satisfying and rewarding work, but if she's had a bad day, plopping a roast chicken in front of her will only make things worse.

Cooking vegetarian isn't something I mind doing on occasion; one of my more tasty tricks is to use spinach where you would be using something heavier, and steaming it to retain its bulk. It doesn't go so far as emulating meat like tofu can, but it does a good job of making its absence less noticeable.

This:
...does a great job of highlighting that.

Ingredients:
  • 1 cup white rice
  • 1 cup water
  • 1 cup vegetable broth
  • 1/4 pound spinach
  • 1 small yellow onion
  • 1 tsp minced garlic
  • 1/4 cup water
  • 1/8 cup olive oil
  • 1/8 cup apple cider vinegar
pinches of:
  • salt
  • pepper
  • cumin
  • celery salt
  • paprika
The Gist:

Cook the rice in whatever manner you like, but instead of using twice the volume of rice in water, use half water and half broth. Vegetable broth is fine (and vegetarian, obviously) though chicken broth works fine, too.

While the rice is cooking, lightly char the sliced onion in the bottom of a medium saucepan with a little oil. You're going to be tempted to stir it; don't. You want that lightly charred flavor because you're going to be steaming it after this and you don't want all of the flavor to leech away.

Once the onions char (10 minutes or so; don't overdo it) put the spinach in the pot with the garlic and 1/4 cup of water. Wait for the water to boil, cover, and reduce heat to a simmer. Cook until the spinach is tender but still retains its liquids, about 8 minutes, give or take.

Serve with a drizzling sauce made up of the olive oil, vinegar and spices.

Prepared this way, it will serve two, though it doubles easily.

Thursday, September 11, 2008

Whistle a Happy...you know what? That's a truly awful pun. Never mind.

Sometimes I over-think things. Combine that with my urge to show off and sometimes I get bitten in the ass.

Take yesterday, for example. When going over what to eat for dinner with the girl, everything either of us felt like required one (usually embarrassingly basic) ingredient more than we had in the cupboard. If our cravings were strident and we were missing everything to make the dish in question except half a stick of butter and some salt, a trip to the market wouldn't feel so out-of-place, but to go out just to get pasta felt wrong.

So we (ie, she) decided that I should make one of the easiest meals available on short notice: tuna melts.

I mean, come on. The only tricky thing about a tuna melt is the Jenga-master reflexes necessary to keep the contents of the thing from sliding sideways out from its bread when flipping it over to toast its other side, and we have an extra-wide spatula specifically for flipping grilled sandwiches because I have excellent reflexes and terrible spacial coordination skills - I can catch a falling salt shaker in mid-air but will more often than not manage to stub my toe while setting it down on the counter.

Anyway. It seemed to me at the time that a good many restaurant tuna melts are one step behind where they should be because they use the same tuna for cold sandwiches as they do for hot, but that toasting the thing in butter fundamentally alters the way your teeth are going to interact with it. Fried bread is salty, crunchy and mildly sweet, so the tuna in question should be less salty, less crunchy and spicier than the stuff you'd be putting on toasted white.

So instead of yellow onions I used green ones (same flavor, less crunch), threw in some celery to make it just a little bit crunchy but less crunchy than the onions would have, halved the salt and doubled the pepper. And it was good tuna salad...and then I made two really silly mistakes: I put tomato on the thing, completely wrecking the balance I had crafted, and I forgot that a tuna melt is a very different beast than a grilled cheese when it comes to cooking it.

It was good, but it could've been better. I will admit, though:
...it takes one hell of a photo.

Ingredients:
  • 1 can solid white tuna, in water
  • 1 large handful green onion, chopped
  • 1 rib celery, finely chopped
  • 2-3 tsp. mayonnaise
  • 1-2 tsp lemon juice
  • pinch of salt
  • heavy shake of black pepper
  • 2 slices deli American cheese
  • Your choice of bread
  • 2 handfuls fresh leaf spinach
  • butter for frying
The Gist:

Combine the first 7 ingredients in a bowl; mix with a fork.

Melt some butter in a pan over low heat. This is the non-tomato-related thing I screwed up - grilled cheese, you can cook over medium because the cheese is always within a quarter-inch of the pan, and it's going to melt fast. But a tuna melt is a much more delicate thing. Fry it gently: you'll need to heat up the tuna and melt the cheese before you burn the bread.

Anyway. Put together your sandwich. From bottom to top it should go bread / tuna / spinach / cheese / bread, and it needs to go into the pan upside down first, with the cheese on the bottom. This will melt the cheese enough so that, when you flip the sandwich to fry the other side, the cheese will melt down into the spinach and the tuna.

If your heat is low enough, it should take 5-7 minutes to a side. If you can't hear it frying, you need more butter. If it starts to smoke, your pan is too hot.

You don't strictly need the spinach, but I like it. It tricks me for a little bit into thinking this thing is even remotely good for me.

One can of tuna prepared like this makes two melts with a bit left over.

Wednesday, September 10, 2008

Where's the Be...oh. There it is.

If you have access to a crock pot, stew is so stupidly easy to make it feels almost like a breach of contract not to make some around this time of year and eat it, and eat it, and keep on eating it until it's gone, by which time you probably won't ever want to fish the thing out of the closet ever again.

I call that 'tradition.'

I love a good stew, but only once or twice a year when the weather turns unexpectedly cold for the first time in September and maybe on a lazy weekend around Christmas. In July I'm more likely to throw some tuna salad on a roll and get the hell out of the kitchen rather than raise the temperature of our apartment even a little with my presence in it.

The weather turned a few days ago, just slightly but noticeably, and with it came a pit-of-the-stomach craving for autumn things, or at least for things I associate with autumn: corduroy floor pillows and saltines with cream cheese and Sunday afternoon football, and, of course,
...stew.

I've been trying to nail my father's stew recipe for years, and I never get it quite right. I think I came close this time, but I'm still missing something in the formulation that I can't quite put my finger on. I could just ask him, I guess, but I'd much rather come to him and proclaim that I've nailed it. Our relationship is like that.

In the meantime, this will do just fine. It'll make enough stew to stuff four people to the rafters.

Ingredients:

  • 2 pounds of cubed beef, lean but not too lean
  • 2 carrots, rough cut
  • 2 celery ribs, rough cut
  • 1 onion, rough cut
  • 1 large potato, rough cut
  • 8 mushrooms, whole or halved
  • 1 cup red wine
  • 1 cup water
  • 1 bay leaf
  • 1/2 tsp thyme
  • 1/2 tsp dry mustard
  • salt and pepper
The Gist:

I wasn't kidding about this being stupidly easy - take everything on that list, put it into a crock pot on low and it'll be done 8 hours later. The best way to take care of this is to arrange the ingredients in the pot the night before you want to eat it, stow it in the fridge until morning and put it on to cook before work; it'll be done by dinner.

You can also, as I did as an experiment, make herbed biscuits in the crock pot - drop spoonfuls of biscuit dough on top of the stew a half-hour before serving and turn the pot up to high - but realistically it makes the thing too heavy and starchy - the stew can support itself without any bready backup.

Monday, September 8, 2008

Culinary Transparency

The best thing about Chinese takeout, at least the kind found on almost every street corner in New York City, is that you're never more than 15 feet from your food, usually in a direct line of sight with it, as it's being cooked. It's the pure transparency of the thing that gets to me - restaurants with open kitchens are a comparatively new and trendy thing in the world of haute cuisine, but it's old hat to me. I'm not sure what does it, but food tastes better when you can watch it being prepared.

I've always been fascinated by how so few ingredients can make something so incredibly tasty as, say, fried rice, to the point where I sometimes get a craving that can be sated by four hours on a bus and nothing else.

I haven't done it on a whim yet, but don't tempt me.

At home, you can't beat a quick stir-fry for ease of preparation, but my only real problem with throwing a bunch of stuff into a wok and dizzying it up with a wooden spoon is how tired I get of the finishing sauces after awhile - most of the Chinese takeout sauces the American palette is typically familiar with and have easy access to fall into the rather generic collection of Sweet, Hot, Garlicky or (for lack of a better descriptor) White. It makes selecting from a menu easy (you identify a craving and run with it) but it doesn't do much if you're looking for a little subtlety, though to be fair I guess that's what I get for being cheap.

The sauce this recipe creates is a bit confusing until you get used to it - it's hot enough to clear out your sinuses, then garlicky at the back of the mouth before rounding out as sweet. I've included directions for this:
...a generic chicken stir-fry, but the sauce is the point. It's truly wonderful in its versatility - apart from being wonderful in a wok, it's great as a salmon glaze, as a chicken wing sauce (I can't recommend this enough, particularly if the wings are tossed lightly in sesame seeds as a finish) or as a salad dressing.

Sauce Ingredients:
  • 1/4 cup soy sauce
  • 2 tbsp butter
  • 1 tsp minced garlic
  • 1/2 tsp Huy Fong-brand hot chili sauce for spicy, 1 tsp for hot
  • 1/2 tsp brown sugar
  • 1/4 tsp ground ginger
  • 3 dashes black pepper
  • 2 dashes paprika
  • 1/2 dash white pepper
  • chopped scallions
Stir-Fry Ingredients:
  • base ingredients - I used a chicken breast, a handful of snow peas and a quarter onion
  • 1 tbsp vegetable oil
  • 1 tsp minced garlic
  • Heavy dash of soy sauce

The Gist:

Combine the sauce ingredients in a small saucepan over low heat, stirring occasionally, until it bubbles.

Heat the oil in a slope-sided pan until spitting hot. Add the stir-fry ingredients and stir constantly until cooked through. Take off the heat when finished, drain any excess liquids and return it to the pan over medium heat.

Pour the sauce over the stir-fry and toss to combine (don't burn the sauce). Serve over rice.

Considerations:
  • Huy Fong-brand Thai chili sauce is a truly amazing sauce that I'd recommend you keep a bottle of on-hand, but tolerances for it vary by the individual; try it out before you commit, and add it slowly.

Saturday, September 6, 2008

Ding!

We have a microwave in our kitchen. The operative words there are our and we, of course - if I had my way, if I had a choice, if I had a little gumption and a pocket with sixteen spare dollar bills in it (and, realistically, if I were a completely different person) I'd screw some feet to the thing to turn it into a step-stool and replace it with one of these:
...because unlike the microwave, that timer is sophisticated enough to count backwards from 3,600 twice at the same time.

(Available for sale at uncommongoods.com; link courtesy of boingboing.)

Thursday, September 4, 2008

Tea for Two

My Grandmother drank tea the way young people drink beer.

The deal was, it seemed to me at the time, that she made a pot of it (she was the only person I'd ever seen make tea in an actual pot outside of restaurants) and we couldn't end our visit until the pot was empty. She would ask if my mother would like something, maybe some tea, and Mom would say no but never all that insistently because Eva would be up and out of her chair on the way to the stove to grab the kettle (not the same as the pot, I learned) before the first syllable was out of her mouth. Somewhere between Want and Some, the kettle would be filled, the burner would be lit, and any protestations my mother would make wouldn't actually change Eva's movements at all, so she didn't really bother.

Her kettle didn't whistle, but you could hear the water boiling halfway across the apartment.

I like tea because of Eva's tea; no tea tasted like hers. She was an O'Hara, and while her son (my father) claims no relationship to her Irish heritage, preferring to think of himself as German, I've been drinking sweet, milky, buttery tea since I was seven or eight. The German part of me didn't have a prayer against that kind of genetic weight, bound solid with a plea to a child's sweet tooth.

After Eva died (this was years and years ago) I went looking for tea that tasted like that, but nothing I found came close.

Before last Christmas, when I knew I would be moving to Massachusetts, Mom asked me if there was anything from my family's kitchen I wanted to take with me.

I wanted their set of these:
They were Eva's. I drank out of them as a kid at her kitchen table, then at my dining room table. Their bottoms are scratched deep with silver from the tips of thousands of spoons.

When I unwrapped them on Christmas Eve, I remembered to ask Mom what kind of tea Eva drank.

Turns out, it was Lipton's. Just Lipton's. Nothing fancy, nothing smuggled from the old country in the bottoms of suitcases, just generic tea that, as my mother told me, Eva would load down with cream. In my adult life, I'd only ever had it with milk.

I keep cream in the fridge. If in my writing here I ever call cream a staple, a necessity, a thing never-to-be-without, that's why - because sometimes I want to have a cup of tea with my Grandmother, and when I do milk just won't cut it.

Tuesday, September 2, 2008

Broth Matters

At some point when I wasn't looking, broth became a steak delivery system.

Don't get me wrong; I positively adore steak delivery systems; most of the time, I am one. But broth should be hearty more-or-less on its own - you don't need to put an entire chicken in it to make it taste like something.

Part of it is an expectations game - pre-made soup companies nowadays focus on the stuff floating in the broth instead of the broth itself. This is fine, I guess, but it's gotten to the point where the broth in a can of hearty soup isn't anything more than salt water with beef concentrate in it. It's a shame, and it's a bit of a nomenclature problem - maybe it's just me, but soup that's more ingredients than stock isn't soup; it's stew.

Broth matters. And I, for one, think it's about time that some attention was paid to it.

This:
...is about as much attention as broth can possibly get while still being graced with some bulk. The potatoes work in conjunction with the gelatin from the bones as a thickener without having to use flour (which can get messy) and the mushrooms mostly act as a broth concentrator.

A nice side effect of this recipe is, like most soups, it's made up of things you probably would have thrown away if you weren't thinking ahead. Remember when I said it's smart to buy whole chicken wings for frying and save the tips? This is where the tips go. I can feed 3-4 people with this recipe and all it will cost me is a handful of vegetables, some scraps from the freezer and some spices.

Ingredients:

Stock:
  • 2-4 pork chop bones, depending on size
  • 12 chicken wing tips
  • 2 whole cloves garlic
  • 1 onion, peeled and quartered
  • 2 celery stalks, roughly cut up
  • Enough water to fill a medium pot
  • 1/2 tsp paprika
  • 1/4 tsp cumin
  • salt and pepper
Bulk:
  • 2 potatoes, cubed
  • 6-8 mushrooms, roughly chopped
  • green onion as garnish
The Gist:

Combine the stock ingredients in a big pot. Bring to a boil before reducing the heat to provide an energetic simmer. Simmer covered for an hour or so, then remove the lid and continue simmering.

When the liquid volume has halved itself (30 minutes to an hour, depending), top it off with water. When it's halved itself again, run the liquid through a strainer, discard the solid ingredients and put the stock in the fridge overnight.

Come the next day, you'll find that the stock's fat has risen to the top of the pot and solidified. Skim it off with a ladle.

An hour or so before serving, add the potatoes and mushrooms to the pot and return to a simmer. Heat until the potatoes are soft, ladle into bowls, garnish with green onion and serve with buttered bread.

Considerations:
  • Don't let the stock boil for too long before letting it simmer - boiling the bones too roughly will lead to a bitter stock. Be gentle with it and your stock will remain hearty and mildly sweet.
  • We (at least, I) have become used to salty soups, but the purpose of this one is to showcase the broth; go easy on the salt and let the stock speak for itself for a change.
  • I haven't tried it yet, but I think this soup would be amazing with tofu substituted for half or all of the potatoes.

Monday, September 1, 2008

On a Wing and a Prayer

Making food easy to eat can be a pleasure, a pleasure akin (I imagine) to cutting the crusts off your kid's sandwiches before school.

(Off-topic and slightly embarrassing fact - the first time I made Angela a sandwich, I asked her in which direction she wanted it cut in half and whether I should remove her crusts for her. If you ever want somebody to fall for you, that's apparently a good question to start with.)

But sometimes difficult food is a virtue - a good steak isn't anywhere near as satisfying if you don't cut into it yourself; pancakes arriving at your diner table with maple syrup already on them would (rightly) cause a minor riot; cotton candy has to be bigger than your face or it absolutely doesn't count.

We like to play with our food, and sometimes it's actually within societal norms to do it.

The epitome of this ethos, though, is difficult food that's easy to prepare, and the perfect example of this, at least in the moment, is:
Buffalo wings. They cover you in sauce, they're delicious and they require very, very little work, at least by my definitions.

This recipe is a slight variation of a recipe that is available all over the internet (though for reference, my working copy came from CDKitchen.com) that supposedly has managed to escape from the Anchor Bar, the self-proclaimed home of buffalo wings in Upstate New York. How authentic it is, I would love to know, but it's tasty by any standards.

My version is less salty, slightly less spicy and more flavorful than the ones I've found; feel free to futz around with the proportions (it's a lot of pinches and dashes anyway) but keep this in mind: if you want to make it less spicy but want to keep its body, add more Frank's, not less tabasco, and vice versa. It's backwards, but it works.

Ingredients:
  • 12 chicken wing pieces (6 drumettes, 6 of the other kind)
  • 4 tablespoons Frank's Hot Sauce
  • 2 tablespoons margarine
  • 1 teaspoon apple cider vinegar
  • 1/2 teaspoon Tabasco
  • Splash of Worcestershire Sauce
Heavy Pinches of:
  • Cayenne pepper
  • Paprika
  • Black pepper
Pinches of:
  • celery salt
  • garlic powder
The Gist:

Fair warning - you're going to be deep-frying these wings. You can bake them if you want, but I've done both and frying them tastes leagues better.

Heat two inches of oil (soybean, canola or peanut; I like soybean) in the bottom of a big pot to 375 degrees F. Drop the halved wings gently into the oil and stand back; they're gonna spit like crazy.

While they're frying, combine all of the rest of the ingredients in a small pot until warm; cover and turn off heat.

Pull the wings from the oil with metal tongs when finished (it should take 12-15 minutes or so - the outer parts of the wings should be brown and crispy) and dry them on paper towels. Put them in a bowl, pour the sauce over them and toss to cover. Serve with bleu cheese dressing and celery.

Considerations:
  • You're working with hot oil. For the love of all that's holy, be careful. If you have pets or kids, lock them out of the kitchen. Make sure your tools are clean and dry before you start. Get a spatter shield. Stand back as you add the wings to the oil and add them gently to keep spatter to the minimum. Don't reach over or around the oil for any reason. Don't move the pot from one burner to another (or anywhere else) until the oil is room temperature. Learning how to safely deep fry is worth it (ever want to make your own french fries?) but please be smart about it.
  • You can get wings split up into pieces at the market, either fresh or frozen, but I like to cut them up myself - apart from it being a bit cheaper and dirt simple, you also get the wing tips which are great for soup stock. Use a pair of kitchen shears and split them at the joint; fry what you want and freeze the rest for later.
  • You can make your own bleu cheese dipping sauce, but before you do: go to the market and get the cheapest generic-brand bleu cheese dressing you can find (I get bottles that last through fifty wings without rationing for a buck fifty) and try that. I can practically guarantee that no dipping sauce you make will improve on it without making the hassle totally not worth it. I mean, have you ever worked with bleu cheese? It's like trying to cut a block of semi-frozen mayonnaise.
  • And on the subject: don't be stingy with the dipping sauce, and serve it on ice. Nothing sucks more than running out of bleu cheese before you run out of wings, and it doesn't have the same effect warm. Get a glass bowl, fill it with ice, and put a little ceramic pot filled with cheese in the middle with celery around it. It's worth it.

Friday, August 29, 2008

EXTREEEEEME CLOSE-UP

I'm pretty good with tech, but cameras and I have never really gotten along.

One of my favorite writers from another website I'm involved with said:
Get to know the macro features on your camera a whole lot better. Like it or not, food blogs are identified with food porn these days, and I suspect that awkward blurry closeups just won't do...
She was right; I hadn't realized it until just now.

I hadn't eaten all day so I made myself a sandwich for lunch and, while photographing it (which has become a sick sort of habit, let me tell you) I figured out what I was doing wrong or, if I were being honest, where the stupid macro button was hiding.

Expect to see a bunch more pictures like this:
...going forward.

Every time I look at that photo, I have an extreme diner craving. Gr.

Thursday, August 28, 2008

Souper!

You start with a chicken. You bake it, put it on a big plate and strip off what you want to eat. Half of the breast gets sliced for sandwiches; the remaining leg and thigh get saved for chicken salad; the pickings from the bones go great over mac n' cheese; the bones themselves, if you've got some time and some water, get boiled down for soup stock. A chicken, if you do it right, can last a while - at 79 cents a pound for the bird plus some veggies and a few pounds of potatoes, you could conceivably feed two people five wholesome dinners for 15 bucks. That's 1.50 per person, per day.

Out of all the iterations that chicken will go through over five days, it's the soup that doesn't get any credit. Soup feels like the last wheezing gasp before resigning yourself to hitting up the grocery store again.

(Chowder, before y'all New Englanders start getting antsy, is a completely different animal that, at least right now, I'm not qualified to speak to. Check back in five years.)

From a culinary level, though, soup is dead-simple - boil a picked-clean chicken, add vegetables and simmer until it's reduced by half; top off the water and do it again. Complexity is not a trait usually associated with soup. It doesn't really get much more difficult than that.

Pshaw.
This is a recipe for a split-soup - two simple soups, cooked separately, combined at the table, garnished and served. It's sweet and devilishly spicy, creamy and hearty, and with an undeniable stomach-filling bulk.

Ingredients:

Soup 1: Black Bean
(This soup is a version of David Ansel's from his book, The Soup Peddler's Slow & Difficult Soups, modified to make it fight better with the pumpkin soup. Check him out.)
  • 1 tbsp. vegetable oil
  • 1 large can (15oz) diced tomatoes
  • 2 large cans (15oz) black beans, drained
  • 1/2 yellow onion, chopped
  • 3 cloves garlic, diced
  • 2 1/2 tbsp. ground cumin
  • 1/2 tsp. cayenne pepper
  • 1/4 tsp. paprika
  • salt and pepper
Soup 2: Pumpkin
(This is a variation of a recipe found on Mom!Mom!.com, similarly modified.)
  • 2 tbsp. butter
  • 1 can cooked pumpkin (NOT pie filling)
  • 1/2 yellow onion, chopped
  • 2 tbsp brown sugar
  • 1/2 tsp. nutmeg
  • 1/2 tsp cinnamon
  • 2 cups chicken broth
  • 1/2 cup half-and-half
  • salt and pepper
Garnishes (in whatever combination you like)
  • green onion
  • Grated cheddar cheese
  • plain yogurt / sour cream
  • fresh cilantro
  • fresh parsley
The Gist:

Black Bean:
Saute the onions and garlic in oil in a pot until the onions are translucent and the garlic smells like garlic. Add the spices and commingle for a few minutes. Add the drained beans and the undrained tomatoes, cover, and simmer of low heat. The longer you cook it, the better it will taste. It's supposed to be spicy; you can adjust its heat to your whims, but keep in mind that it's only half a soup and that it will be tempered by its compatriot.

Pumpkin:
Saute the onions in the butter in a pot until translucent. Add the rest of the ingredients less the half-and-half, stir to combine, and heat to a simmer. This soup should be thick; if it's watery, simmer off its excess liquids. Take off the heat, add half-and-half and stir to combine. This one is supposed to be sweet, though just short of cloying - add more brown sugar if it's too salty.

Gently combine the two soups at the table, ladling one over or around the other. Garnish and eat.

Be sure you let me know how it goes if you try it.

Sunday, August 17, 2008

Shrimp Salad As a Metaphor For...Oh, Whatever.


Decadence in food is simultaneously misunderstood and underrated.

The prevailing opinion on decadence seems to be that it either requires exotic ingredients or intensive preparation. Quail eggs poached in the tears of a war widow might make somebody's bow tie spin, but in my head it would be much, much easier to provoke a similar reaction from a hungry patron with peanut butter on fresh, seeded rye: just use the heels of the loaf, under-toast them, sprinkle the surface with kosher salt and serve open-faced.

For my father and I for coming up on fifteen years now, the epitome of decadence is shrimp salad on white toast with lettuce, particularly if it comes from the 3 Guys Restaurant across from the Whitney Museum on Madison Avenue in New York City.

Making good shrimp salad isn't difficult, but the ubiquity and low cost of canned tuna has made it far rarer than it really should be. Part of that is because of the perception of shrimp as exotic, crowding the rims of chilled martini glasses filled with ice and cocktail sauce in restaurants with six dollar glasses of water. That perception is deserved to an extent - shrimp for shrimp cocktail, usually branded as "Colossal" by fishmongers, look to be the size of hockey pucks; I say look because I've never actually been able to justify to myself the cost of buying them.

The thing about shrimp salad, though, is that you're going to be cutting the shrimp up and spending money on the big ones is a serious waste of money: frozen 41-50 count shrimp are 4 or 5 dollars a pound in my neighborhood depending on if they're on sale or not, which is actually cheaper than name-brand tuna in a can by weight, even after factoring in the mostly negligible weight of shells and tails.

You can simply substitute cut up shrimp into your grandma's tuna salad recipe if you'd like (though I would cut down on the mayo content a bit to let the shrimp take a bit more control of the thing) but if you'd like something designed for shrimp, try this:


It's hard to be specific about quantities here - a lot depends on the water content of your shrimp, your particular brand of mayo, etc. I'm going to try and give you rules of thumb to keep things easy.

Ingredients:

  • Shrimp, frozen or thawed, in their shells
  • Lemon juice
  • Mayonnaise
  • Tomato, prepared as below
  • Scallions (optional)
  • Parsley, fresh ideally, dried in a pinch
  • Paprika
  • salt and pepper
Theory:

If this were tuna salad, you'd want to add something to fight your teeth a little, an element of crunch. Onion can fill this role, though celery is more common. This is shrimp, though, and the shrimp is going to fight all on its own with a little help from the tomato. You want the sharp bite of the onion, though, which is where the scallions come in. You can go without if you really want to; experiment.

The Gist:

Boil some water and add the shrimp, still in their shells, to the pot - shrimp shells have a ton of flavor and you want that flavor to stay with the shrimp instead of letting it bleed out into the water. Keep an eye on them. You're going to want to boil them for only a few minutes until just before they're done; they'll finish cooking on their own. Cook them too long and they'll lose all of their moisture.

Strain the shrimp into a colander under hot water for a minute, then warm, then cold - you want to step them down from boiling to cool enough to handle.

Shell them. Most commercially available unshelled shrimp these days come with their shells cracked for you and the boiling probably separated the shells slightly from the meat, making it easier. Chop the shrimp into halves or thirds, no smaller. put them into a bowl.

Add enough mayonnaise to the bowl to lightly coat the shrimp. You won't need much, a heaping teaspoon or so. Add approximately half as much chopped tomato meat as you had shrimp. Tomatoes are mostly water - you want to add the drier outside part of the tomato, not the wetter, seedy part. Add half as much chopped scallions as you added tomato, and a healthy pinch of parsley, salt and pepper. Squeeze half a lemon over it, tasting as you go to make sure you don't overdo it. The Paprika is mostly for color.

Refrigerate for 15-30 minutes before eating - you'll want the flavors to commingle and enhance each other, and it tastes better cold.

Serve on white toast with lettuce. It's good on wheat, too, but wheat tries to steal the spotlight; white stays mostly neutral.

Considerations:

  • Once you get the hang of it, you can start substituting this for that. One of my favorite variations is to replace the mayonnaise with whatever salad dressing I have in the fridge at the time. It's particularly good with bleu cheese.

Thursday, August 14, 2008

I ♥ Beef


When I was a kid, sitting at the big slab-marble dinner table, small enough that my feet didn't quite touch the floor, my dad used to pick up the big ceramic serving dish that the main part of our dinner was sitting on, a roast or something like it, and pour the juice over my plate because I was too small to do it myself. I got to tell him when to stop.

The vegetarians in the audience are probably wincing at the image, but I remember those moments as sweet ones, like the stories of my little cousin, one or two years old, running around his house, grinning like a madman with the end of a barbecued rib sticking out of his mouth. Pacifiers apparently work better if they're covered in barbecue sauce. And if they're, um. Made of bone, I guess.

Love's whatever you think it is. In my family, I've realized, love is a rare steak.

I thought I was alone in this, but Gizmodo proved me wrong.

Just sayin' - I know what dad's getting for Christmas.

Wok Me Like A Hurricane


Let's face it: most of the time, fried rice is the second half of a cheap Chinese takeout combo meal used to validate charging you an extra three bucks when, if you had stopped and thought about it beforehand, you would have realized that all you really wanted was an egg roll with your moo goo gai pan. It's an afterthought.

If it's done right, though, right the way Chen Kenichi does it, fried rice is a ballet, a collection of textures and flavors simultaneously working together and fighting with each other - gooey enough to be lifted with chopsticks, light enough to avoid feeling greasy, and spicy enough to singe your eyebrows.

Chef Chen makes it look easy and it's easy to describe with words, but honestly I've never had fried rice that good in my life. Not even close.

The concept of fried rice, though, is a fundamentally sound one, and one you can apply to less austere, more utilitarian (and less Chinese) dishes - take some day-old rice you don't want to go to waste, heat it up in a pan with some oil in it, add some vegetables and call it a carbohydrate.

This:
is one example that happens to work excellently as a side dish, just like its forefather, but a side of a different sort. If you'd like to use it as a main course, double it. Oh, and don't be scared by the vanilla - it's used purely as an aromatic and won't appear in the finished dish as anything more than a pleasant background note.

Ingredients:

  • 1/2 cup cooked brown rice (fresh or day old, but day-old is actually tastier)
  • 1 red onion, roughly chopped
  • 4 white mushrooms, chopped
  • 2 tbsp olive oil, 1 tbsp at a time
  • 1/2 tsp minced garlic
  • 1/2 tsp turmeric
  • 1/4 tsp vanilla extract
  • Salt and Pepper

The Gist:

If you don't have any leftover rice handy, make some. The method is up to you - I have a rice cooker, but a pot on the stove with some water in it works fine, too.

Combine everything but the rice, the turmeric and 1 tbsp of the olive oil in a bowl and let it sit at room temperature while you heat a pan over medium-high heat.

Speaking of pans: do you have one of these?
A slope-sided, flat-bottomed pan will make cooking this easier - while it's totally possible to do it in a frying pan, a wok pan will keep the oil hot, make the rice easier to move around and help you not get food all over your stove-top.

Anyway. Once the pan is hot, add the vegetable mixture. Keep it moving so it doesn't burn, and cook until the onions soften and the mushrooms brown. It should take 5 minutes or so. Pour the vegetables into a bowl and rinse out your pan.

Add the second tbsp of oil and heat it up to medium again before adding the rice and the turmeric. Keep moving the rice as you did before with the vegetables for 5 minutes or so before adding the vegetables back to the pan. Work them together and get them off of the heat before it burns.

Eat up! I made this as a side for pork chops and peas and it was fantastic. I'm sure it would work great as a main dish tossed with shrimp or ham, as well.

Mmm. Ham.


Considerations:

  • Turmeric, though tasty, will turn everything it touches (your hands, your stove, your pets) a frightening shade of yellow. Try not, as I did when I cooked this, to pour it while standing under the influence of a ceiling fan. (oops)
  • Stir-frying with olive oil is usually a bad idea - while it's more flavorful and healthier than its cousins, it also starts to smoke and at a much lower temperature than, say, canola or peanut oils do. To that end, you don't want the heat to go any higher than a tick over medium. You can get away with it here, though, because nothing you're going to be cooking is going to kill you if it isn't cooked through; just don't try this with chicken.

Serves 2 as a side dish or 1 as a meal. It doubles, but only up to a point - any more than double this recipe and you might have to cook it either in a stock pot or in shifts.

Tuesday, August 12, 2008

Gouda for You!

Grocery stores in the Bedford-Stuyvesant neighborhood of Brooklyn are odd places. Real estate in New York City is fantastically expensive and grocers are forced to focus, to pare down their stock to the absolute minimum of what their customers are going to need to buy. As an example, the last time I went grocery shopping at the Key Foods around the corner from my apartment in Brooklyn before packing everything I owned into a U-Haul and trekking up to Massachusetts (a weird sort of reverse pilgrimage - I knew a dozen people who were insistent on making the move in the opposite direction) I discovered the grocer didn't carry yeast, a food-stuff so entirely basic that I had always assumed it was on-hand even if I had never actually needed it until I met a girl who adamantly insisted on teaching me how to bake bread.

So No Yeast Til Brooklyn - the neighborhood had decided that its denizens, predominantly lower- and lower-middle class black people with a smattering but increasingly scary influx of yuppies and hipsters gentrifying the hell out of the place, don't bake bread. I can buy that - baking bread is becoming more of an artisanal skill as time goes on - But here's the thing: that demographic apparently eats a lot (and I mean a LOT) of gouda. So much gouda is eaten in Bed-Stuy that it's actually cheaper per-pound than most of the processed American cheeses, beaten out (but only very slightly) by the store-brand cheddar. I had lived in and around New York City for most of my life and I had never, ever, bought gouda, so I started.

I became a little obsessed to be honest, which is especially problematic with gouda because, no matter how much of it you eat, it feels like you've always got more. It's a very rich and very flavorful cheese, and more than the slightest bit of it at a time can render you immobile in front of the TV without much effort at all.

For awhile my housemates and I were eating everything with gouda on it: Pasta. Sandwiches. Pizza. Crackers. Tomatoes and peppers. It took over our lives until one of them decided that enough was enough and threw the brick of it away when I wasn't looking.

So that was that, or so I had thought. Fast-forward to present day. Gouda was on sale last weekend. I couldn't help myself. I bought some. In my defense, I actually had a plan: I had realized that, while excavating in that brick of cheese back in Brooklyn looking for gold, I had never tried it on a salad.

This is what I came up with:
It was pretty fantastic, light but still satisfying as a meal on its own, intricately flavorful and elegantly textured.

The best part of it is that, the ingredients are all native (in a way) to Bed Stuy.


Ingredients:
  • 2 chicken thighs, boned and trimmed and sliced into bite-sized pieces
  • 1/2 red onion, roughly cut up.
Marinade:
  • 2 tbsp olive oil
  • 1 tsp minced garlic
  • 1/2 tsp ground sage
  • 1/4 tsp cayenne pepper
  • a healthy few splashes of hot sauce (Frank's Original, ideally)
  • half as much as that of Worcestershire sauce
  • salt and pepper
Salad:
  • Greens of your liking
  • 1 tomato, quartered twice into wedges
Also:
  • Gouda (of course), shaved
  • 1/2 tbsp lime juice (or half as much as that of apple cider vinegar)
The Gist:

Combine the chicken and onion in a bag with the marinade and let it sit for as long as you'd like - the longer it soaks, the better. Overnight is ideal.

When you're ready to cook it, heat some olive oil over medium heat in a pan before adding the contents of the bag. Keep the meat moving or it will stick, brown too fast or burn. Cook it all the way through. When it's done, add it to a bowl containing the greens and the tomato, toss it with the lime juice or vinegar, add the gouda to the
top, toss it again and you're done.

Considerations:
  • Frank's really is the best hot sauce for this - tabasco can be overpowering and chili sauce is too thick.
  • Be careful with the gouda - I wasn't kidding about it being rich. Two or three big slices or a light handful of it crumbled will do ya.
  • If you decide to marinate it for a shorter period of time, reserve some hot sauce and sage and add it while it's cooking to accentuate the flavors.
Comfortably will serve two of you, or one of me.

Enjoy, and let me know how it goes.

So. Let's talk about food.

Let's talk about food (bay-bee).

Too often people eat without thinking about it. I don't mean in as much as they aren't concerned with what's sandwiched between the top and bottom bun of whatever they picked up at their fast-food joint of choice, moreso that they eat because it's necessary without actually thinking about what they like about their food.

Take the prototypical fast-food cheeseburger. Its ubiquity belies its construction - such a burger is a work of genius.

In its most fundamental form, you've got a bun, some beef, a slice of cheese, onions, ketchup, mustard and pickles. Not exactly rocket science - I could make some variation of that burger at home in 10 minutes flat that would have the added advantage of not having lived under a heat lamp for any length of time. For reference (and to give me the chance to show off a little) it'd look like this:
The purpose of the fast-food burger is to provide a buck's worth of caloric intake in its simplest form. Of the seven ingredients, the omission of any of them leaves you with something less than ideal: Forget the pickles and you lose the crunch; lose the ketchup and you lose the sweetness necessary to support the tartness of the onions and the bulk of the beef. Not a penny is wasted in its delivery. It's an intricately thought-out, edible wonder which, in my head, deserves the same level of thought on its eater's end as was expended in its construction.

I like to talk about food, and food prep, and food theory. I like thinking about why I like what I eat, why I cook how I do and how I can make my cooking better. I'm not about to tell you that you shouldn't go to Wendy's. I love Wendy's. But it's probably worth stopping every once in awhile and thinking about why you occasionally wake up a 3am in the throes of a vanilla frosty craving.

Or is that just me?